Post Top Ad

Post Top Ad

Monday, 17 April 2017

10:42

Heating Problem in Android Mobile

If you have facing the heating issue in Your Android Mobile Phone, so it's really the problem and we need to take his seriously and find it's solution. So we are trying to provides some solution which may be help to solve heating problem or minimizing the heating problem.

What is Heating Issue in Mobile and How to Solve


Heating problem means when we are using the Mobile in few minutes and Mobile start warming. So this issue depend on the Software and Hardware as well as charging Process, we are discuss below.

Software Problem

Sometimes heating problem solved easily through the updating the Mobile Phone, if your phone heating and you will get update notification so update your Phone, this may be solve the heating problem.

Note: If your Phone heating maximum so please Contact to Service Center.

Hardware Issue

Using the duplicate Charger or duplicate Battery in the Mobile, so it may be causes the heating problem so avoid the using duplicate battery in the Mobile and try to use the original one.

Apps helpful to avoid heating problem

Yes, may be. Trying if you getting the good response by apps in heating problem so trying it and share to us, we are also trying to use. Please trying following guidance if you think-

1. Close all apps and use only 1-2 apps simultaneously

2. When you are playing games offline than turn off the WiFi or Off Data usage

3. Off the Connectivity features if you are not using.

What you think, Charging may dangerous

1. Charging is process to charge the battery but with precaution means we need to use the Charge which come with the Mobile Phone or used that Charger which is similar to original charger (in case of voltage) but use original Charge which is come with Mobile Phone.

2. Charge your Phone 90% to 95% according to my point of view

3. Connect the Charge when your battery level come to 20% or below according to my point of view.

Note: This is only suggestion for good battery backup and also this precaution help on heating issue also so trying it.

4. If you are playing games or doing other thinks and your phones start heating so turn off the Mobile for Few Minutes than start it's will come good.

5. Don't doing any thinks or work or gaming when your Phone is connected to Charger and when your phone is charging so trying to avoid the using.

Hope is


I was trying to provide the useful information but if you find any mistake in my article or any useless material so please suggest me, we will updated it or remove. Thanks for reading on Techable24 Blog.

Sunday, 16 April 2017

04:55

Motorola Moto G5 -- Review, TWRP ROM, Rooting Guide

Are you want the Specification, advantage and disadvantages of Motorola Moto G5 with detailed review, so we are sharing the REVIEW and if you think we are forget to adding any advantage or disadvantage so please share it.

Display, Sound and Memory Detailed Review of Moto G5

5 Inches Full HD IPS Touchscreen with 16M Colors and Multitouch. Display of Moto G5 is good, color combination and Display in night or display in sunlight is good.

3.5mm Jack in Moto G5 with good sound.

Display5 Inches, IPS Multitouch Screen
Sound3.5mm Jack with Active noise cancellation with dedicated mic
Memory16GB ROM with 2GB RAM, 32GB ROM with 3GB RAM

Moto G5 accept MicroSD card upto 256 GB and Moto G5 come with 2 Variants 16GB ROM with 2GB RAM, 32GB ROM with 3GB RAM. 2G or 3G RAM is good for Mobile as well as every process work nice without any issue in 2G RAM as well as 3G RAM.

Moto G5 with Good Display, Good Sound, and with Good Memory.

Operating System, Processor, CPU and Connecting Features of Moto G5

Android Nought 7.0 OS in Moto G5.

Snapdragon 430 Chipset with Octa core 1.4 GHz Cortex A53 Processor and Graphics is Adreno 505. You will get good performance and speed.

OSAndroid 7.0 Nougat
CPUOcta core 1.4 GHz Cortex A53 Processor
GPUAdreno 505
ChipsetQualcomm MSM8937 Snapdragon 430
ConnectivityWiFi, USB 2.0, Bluetooth

WiFi 802.11, Bluetooth V4.2, Radio FM and USB Connectivity with USB V2.0.

FingerPrint Sensor and Other Sensors in Moto G5

Moto G5 come with Front FingerPrint Sensor, and other Sensors are: Accelerometer, Compass, Gyro, Proximity.


FingerPrint SensorYes, in Front
SensorsAccelerometer, Compass, Gyro, Proximity
Weight145 Gram

Camera and Battery Review of Moto G5

Back Camera is 13 MP with f/2.0, Phase Detection Autofocus and LED flash, Moto G5 Camera taking the Good Picture using the Primary Camera and Selfie means Secondary Camera also Good, Front Camera is 5 MP with f/2.2.


Primary Camera13 MP f/2.0, PDA with LED Flash
Secondary Camera5 MP f/2.2
BatteryRemovable 2800 mAh Li-Ion Battery

This time Moto released Moto G5 with Removable battery which is Li-Ion 2800 mAh battery. This is good for Mobile and also Moto G5 support Fast Charging features means you will charge your Mobile in less time. 2800 mAh provided good and Powerful Battery Life with fast charging.

Hope is

This is detailed Review, but We are trying to updating this Review ASAP because we are add something more about the Moto G5 Mobile. If you are using this device so share your review with us. Thanks for reading Techable24 Blog.
04:50

How to Install TWRP ROM in Android Mobile

When we are bought any Android Mobile than it's come with Stock ROM. In the Stock ROM we are not able to do any changes in Android OS. But we need any changes in Android OS like Changes in Firmware etc than we need Custom ROM because Stock ROM may not support changes in Firmware etc. Now I am sharing the SIMPLE WAY to CHANGE STOCK ROM to CUSTOM ROM (TWRP).

Before to start you need to make Backup of data and stored in accessible place.
Precaution: Make backup of Data as well as Firmware.


Before to start think for it because we are not responsible for any damage physically or software based.
Disclaimer: We are not responsible for any damages.


Convert STOCK ROM to CUSTOM ROM (Install TWRP)


1. You need your Android Mobile which is rooted

2. Now you need TWRP ROM according to your Phone or Download TWRP Official Android App

3. Now open the TWRP ROM in Your Mobile Phone
4. Search your Device Name in App (If you not find than not try to flash recovery because it's damage your Mobile)


5. After selection click on "Download TWRP" and after it click on "Flash to Recovery"

6. After completion your device may be rebooted so don't worry.

7. Your ROM is changes.

Hope is


We are trying to sharing the Good Content with the easy process of converting the Stock ROM to TWRP Rom. If you have tried and you have got any issue so please share with us, we will trying to solving that ASAP. Thanks for reading Tutorial on Techable24 Blog.

Thursday, 13 April 2017

10:48

ADB Device Unauthorized Problem Solved in 2 Mins

ADB Device Unauthorized Problem is faced by many users and some users shared it's problem with us, so we are come with the short and perfect solution for it. After this tutorial you will take only 2 mins to solve this problem in your Mobile and PC. So just look the article.

How to Enable USB Debugging Mode in Any Android Phone


1. Open About Phone

2. Now tap on Build Number many times (max 10 times)

3. After that automatically Developer Option will enable

4. Now open the Developer Option and enable USB Debugging

Now you are able to use ADB command in your Android Mobile.

How to solve ADB Device Unauthorized error


If you think that how to solve ADB Device Unauthorized error in your PC when you are trying to giving any command using the ABD, so don't worry we are come with solution which are very easy in archive and use. Now follow the steps

1. Open Command Prompt with ADB means where you are stored adb files, open that folder and press "CTRL+SHIFT+Right Click" and select and click on Open Command Prompt option

2. Now enter following command

start adb

adb start-server

adb usb


3. After that your device is not unauthorized and you are able to use any command in your Android Mobile using PC/ Computer.

Hope is


If you getting following problem in "device unauthorized please check the confirmation dialog on your device, adb unauthorized recovery, adb vendor keys not set, adb device unauthorized bypass, adb devices unauthorized nexus 5, adb device unauthorized broken screen, revoke usb debugging authorization missing, adb device unauthorized message, msg> if you getting any problem listed above than you are come to right place, I was told the details and solution about the problem above. Now please share it and share your comments with us. Thanks for reading in Techable24 Blog.
02:14

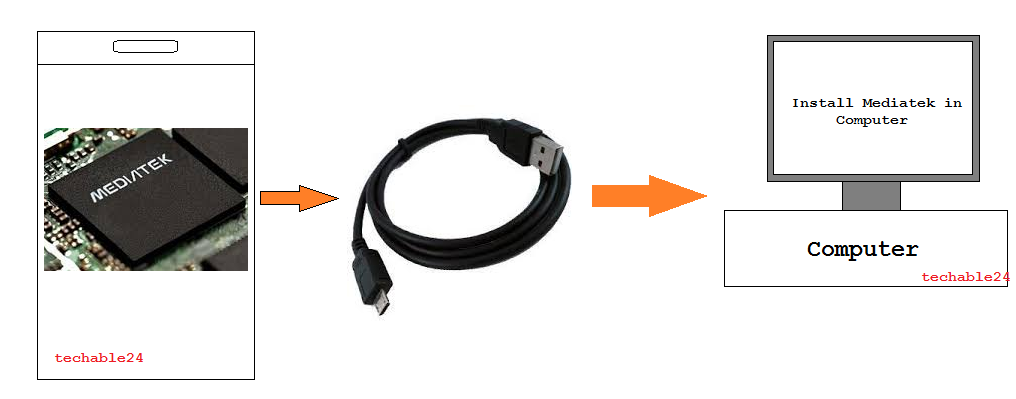
Download and Install Mediatek MTK VCOM Driver in Windows

Are you trying to Flashing your Mobile Phone so you need the Driver of Mobile Phone, if you have not found driver of your Mobile than you need the Custom Driver means Mediatek MTK VCOM Driver for your PC in Windows XP, Windows 7, Windows 8, Windows 10. So I will discuss how to download and how to install Mediatek MTK VCOM Driver.


Note: If you want SP Flash works properly in your PC with Your Mobile phone than you need to know the Mediatek Chopset and install the correct Mediatek VCOM Driver in your PC. Than SP Flash works properly without any problem.

How to check Meditek MTK Chipset of Your Mobile Phone


1. Download CPU-Z App in your Phone

2. Now open CPU-Z App and when app will open and than you seen the Mediatek Chipset on Top Corner of App.

This is very easy to check your Mediatek MTK Chipset for your Mobile Phone. Now you have known your MTK Chipset so installed MTK Driver according to your Mediatek Version. like Mediatek MTK6592 / MTK6582 / MTK6589 / MTK6577 / MTK6575 / MTK6572/ MT6577.

Download Mediatek MTK VCOM USB Driver for Windows


1. Just Open Google Search URL

2. Now type "Mediatek MTK ?(Version name like MT6577) VCOM Driver" in search box and search

3. Now you will get many option for downloading so download Drivers
Note: We will also include download link for Mediatek MTK VCOM USB Driver for Windows.

Install Mediatek MTK VCOM USB Driver for Windows XP/Vista/7/8/8.1/10


1. Open Device Manager Option in Your Computer

2. Now right click on PC Name and click on ADD LEGACY HARDWARE option

3. Now click on Next and select "Install the hardware that I manually select from a list (Advanced)"

4. Select "Show All Devices" and click Next

5. Now click on "Have Disk" and select Mediatek Folder, and select OS Folder which you using like Windows 7 and select
6. Now add all Meditek Driver in the list

7. Than click on Next than Mediaktek Driver will installed automatically.

8. Restart your PC and now VCOM Driver is installed in your PC.

Conclusion

May be this tutorial is helpful for you, if you facing any problem in installed Mediatek MTK VCOM Driver in your PC than please share your error and problem which you are facing in your PC and Mobile. Thanks for reading Article on Techable24 Blog.

Tuesday, 14 February 2017

02:14

How to Fix USB Device Not Recognized Problem

If you getting following Problem in your PC, Laptop, Computer (Windows 10, Windows 8, Windows 7, Windows Vista, Windows XP):-
USB Device Not Recognized when connect Android Mobile to PC
USB Device Not Recognized when connect Any Mobile
USB Device Not Recognized when Device like Pen Drive, USB External Hard Drive
USB Device Not Recognized Error 43 when connect Android Mobile to PC

Above following problem will happened in Computer than follow steps and guide which is describe in this tutorial. Problem Described:- Hello friends, I am facing the problem with my Phone Micromax E313. My phone was broken falling the mobile on the table than my mobile give me the error "USB Device Not Recognized Problem". So I am giving the absolute solution for it. If you getting USB Device Not Recognized Problem than your USB Port is damaged or Mobile Charging Port is damaged or driver problem. In my mobile, Mobile Port was damaged which was repaired in Service Center now mobile phone not giving any kind of message, so please find out the problem than try to solve it and read full article for solution, may be you got the solution easily.

How to Fix USB Device Not Recognized Problem


If you getting USB Device Not Recognized Problem than this is two types of Problem

1. Driver/ Software Problem


First Install Driver of respected Device in your PC than connect your Mobile, Hard Disk, USB Enable Device etc. If it's the Driver Problem than it will resolve easily after installing Driver but if it's other issue related problem so you will got error message "USB Device Not Recognized Problem" again. Than try second method.

2. Hardware Problem


Hardware problem like:

-> Device like Mobile, Hard Disk etc Connector damage problem
-> PC USB Connector Problem
-> Data Cable Problem
Sometimes Driver issue happened but sometimes hardware issue will also happened, so if Method 1 not working than it's the problem of Hardware issue, so check first Data Cable, than USB Port of PC after that Device Connector.
If it's hardware problem so you need to repair your Device than connect, and USB Device Not Recognized Problem will surely resolved.

Hope is


I am tried to give the accurate information about the "USB Device Not Recognized problem" but if you think it's not accurate than please suggest your opinion with us we will try to give you the accurate Information so please comments. Thanks for reading tutorial on Techable24 Blog.

Wednesday, 8 February 2017

09:37

Fix "Unwanted App Installation" Notification Error and Problem (100% Working)

I am sharing tutorial related to Ads or Apps Ads which are come after every minutes when we are connected to Internet that called Unwanted Apps Installing Error or Problem without Permission and automatically start installing apps which are occurred in our Android Mobile Phones. I have already seen that type of problem and I am resolved it and this method is working properly on Mobile Phone.

How to Stop "Unwanted App Installing" Automatically Without Permission


So you need One App which is work and stop that problem on our Mobile Phone, so Follow steps:

1. Download 360 Security - Antivirus App from Play Store
2. Install and Open 360 Security - Antivirus App
3. Now Tap on Boost Option and click on Boost

4. Now tap on Clean Option and click on Scan

5. Now tap on Antivirus and Click on SCAN

6. After that they shown some threads and ask for Repairing so click on Repair All

7. Now your Device is problem free, now you are not seen Unwanted apps automatically installing problem without permission on your Mobile or device.
Hindi Tutorial of Fix "Unwanted App Installing" Notification Error and Problem (100% Working)

Hope


I think this tutorial is help in your Unwanted App Installing" Notification Error and Problem in Android Mobile (like Lyf Mobile, Micromax, Samsung, HTC, Karbonn, Lava, Infocus, Xioami Redmi etc). If your problem is resolved so please tell to us and if problem is still on your phone so also tell to us, we will try to solve. Thanks for reading on Techable24 Blog.